Uploading a video
your YouTube channel
Uploading a new video to your YouTube Channel
YouTube is a free video platform that can host an unlimited amount of videos for you. The benefit of using an external video hosting platform like YouTube is that you can publish videos without making your website slower and even without having a website at all.
To follow the steps below you first need to create your own YouTube account.
Step 1
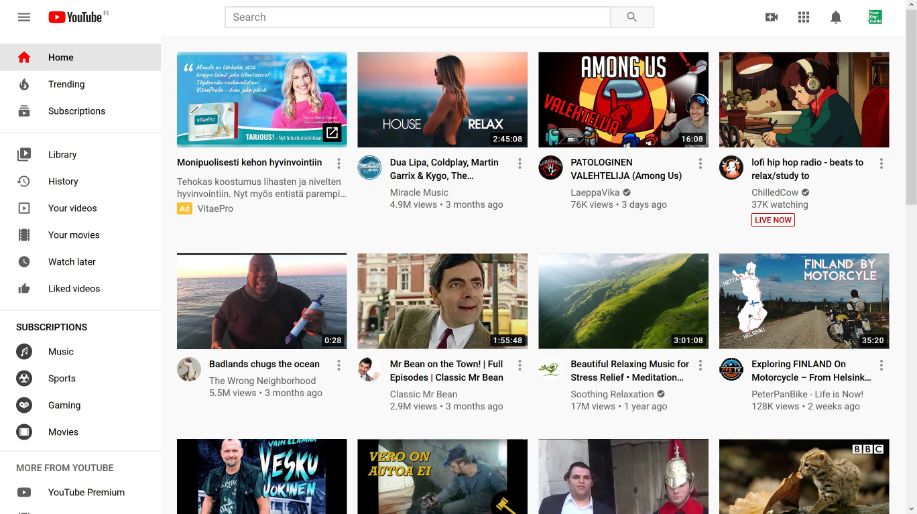
The first thing you need to do is navigate to youtube.com. Make sure you are logged in and have selected the correct channel. Therefore check the logo in the top right corner of the screen. If it shows your logo, you are ready to proceed with step 3.
Step 2
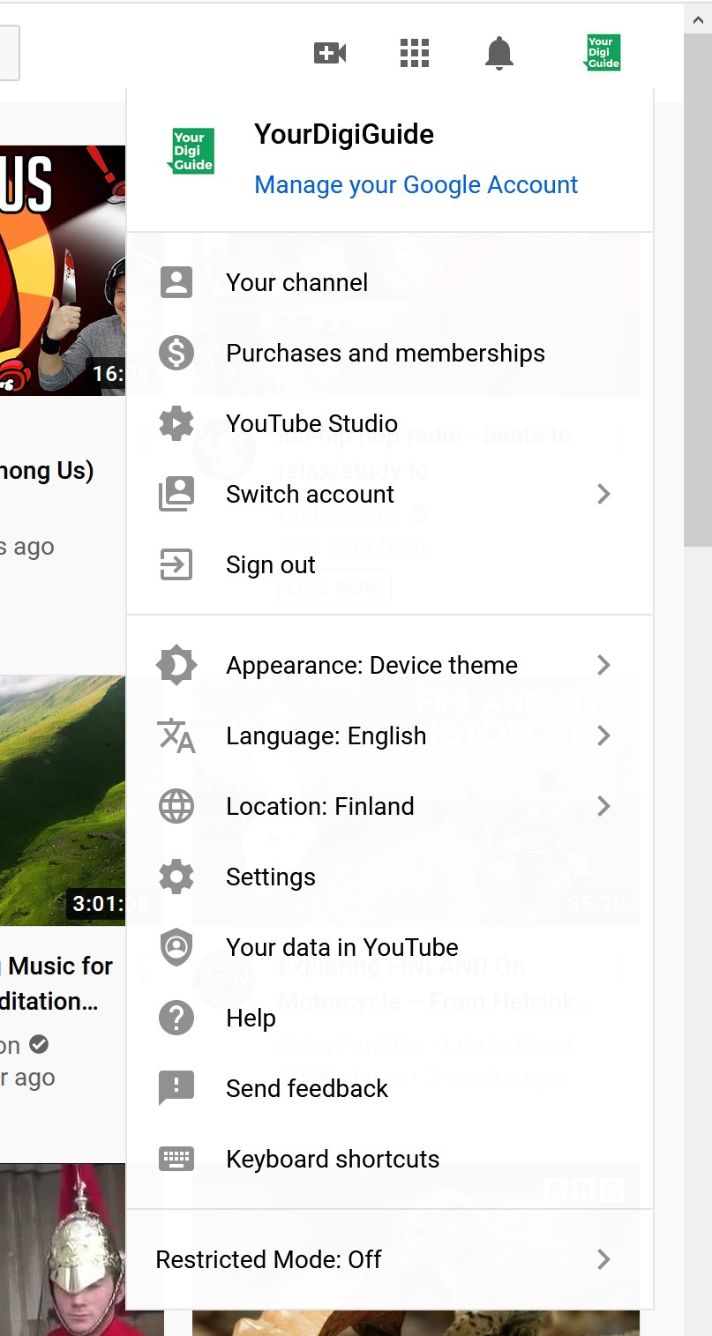
If the logo in the upper right corner is not the correct one, you either have to log in first or, if it shows a different logo, you need to change the channel. Therefore click on the log and in the dropdown menu select Switch account.
Then select the channel you want to upload to,
Step 3
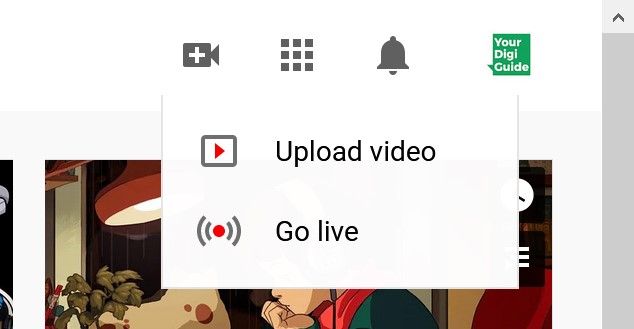
After you have made sure you have selected the correct channel, click on the camera icon in the top right corner. Click on Upload video.
Step 4
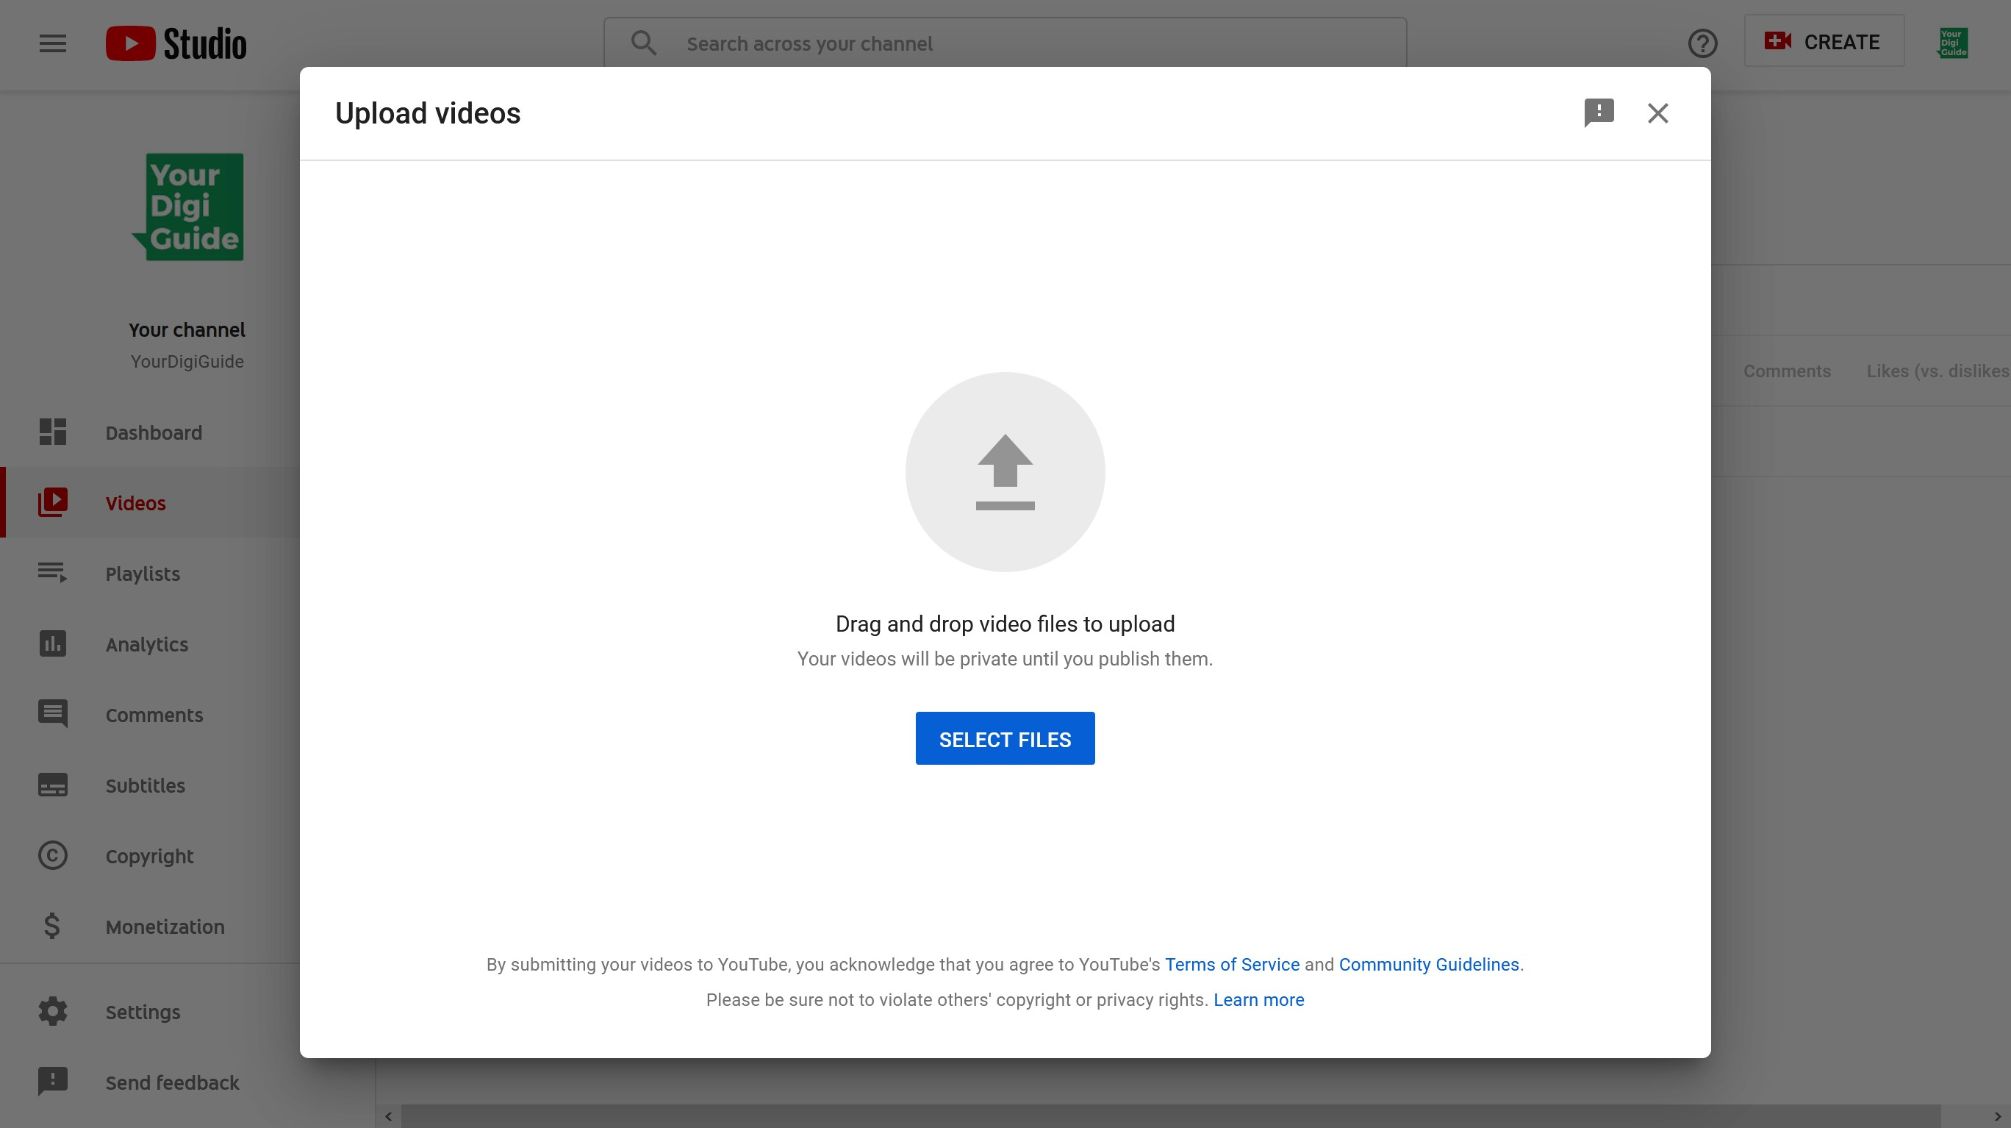
A new window will pop up. Now you can upload your video file either by dragging it from your files into the window or by clicking Select Files and choosing it from your files.
It might now take a few moments until the video is loaded.
Step 5
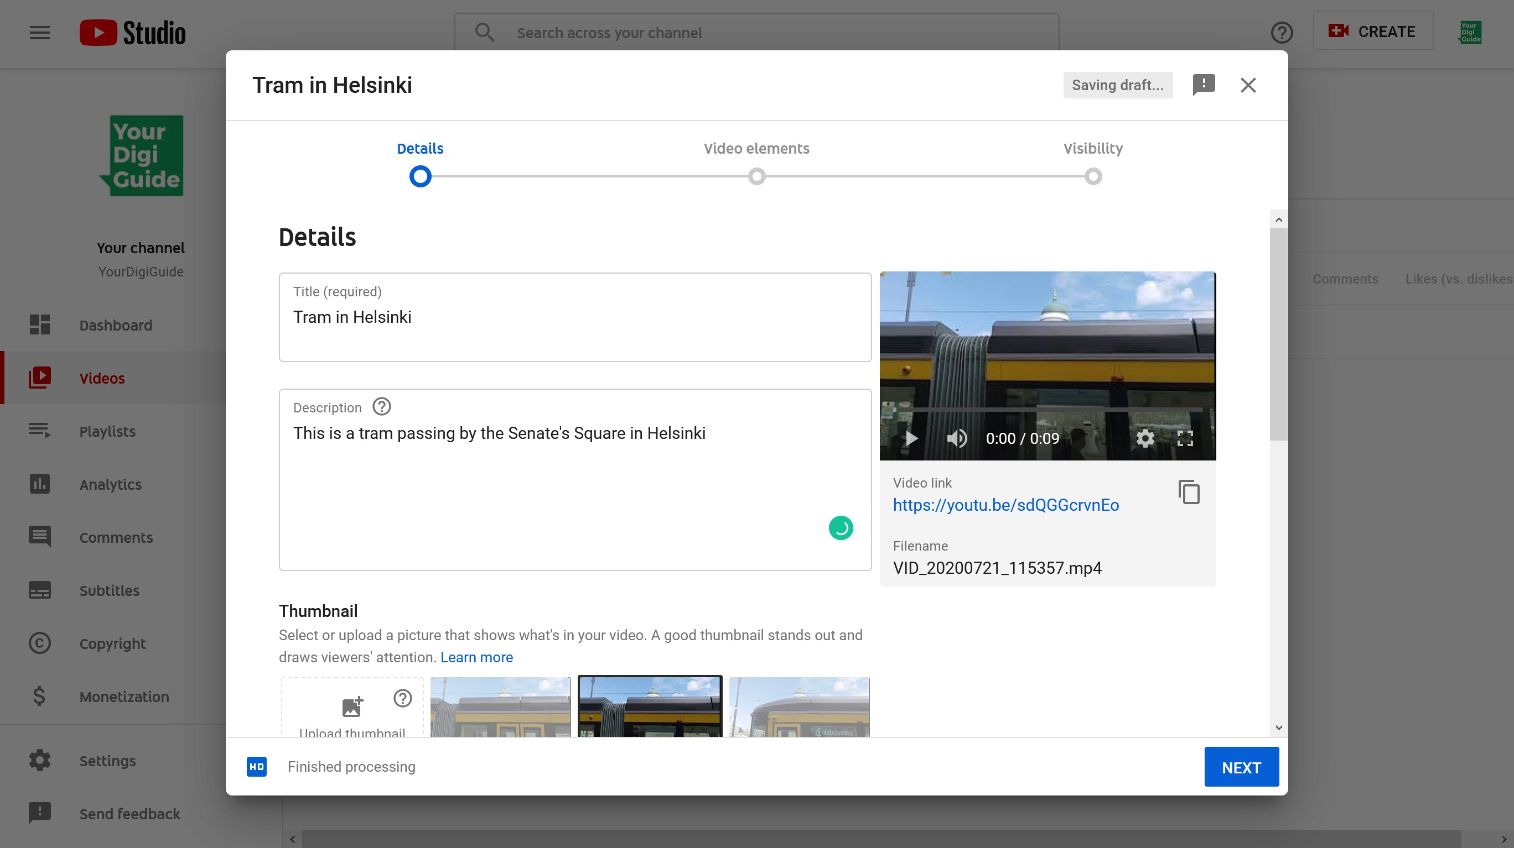
Now you can give your video a title (make sure to replace the usually very cryptic file name as a title).
In the description you can leave a few more details about the video. Think what might be useful for viewers. You can also add a link here if you like.
Under Thumbnail you can choose the picture that should be shown before the video starts. You can either choose one of the suggested screenshots or upload a different picture (be aware that for the second option you first need to verify your YouTube account).
Scroll down and still indicate if the video you uploaded is made for kids. This is only relevant if you are specifically targeting children with this video. Otherwise, click No.
Once you are done, click Next.
Step 6
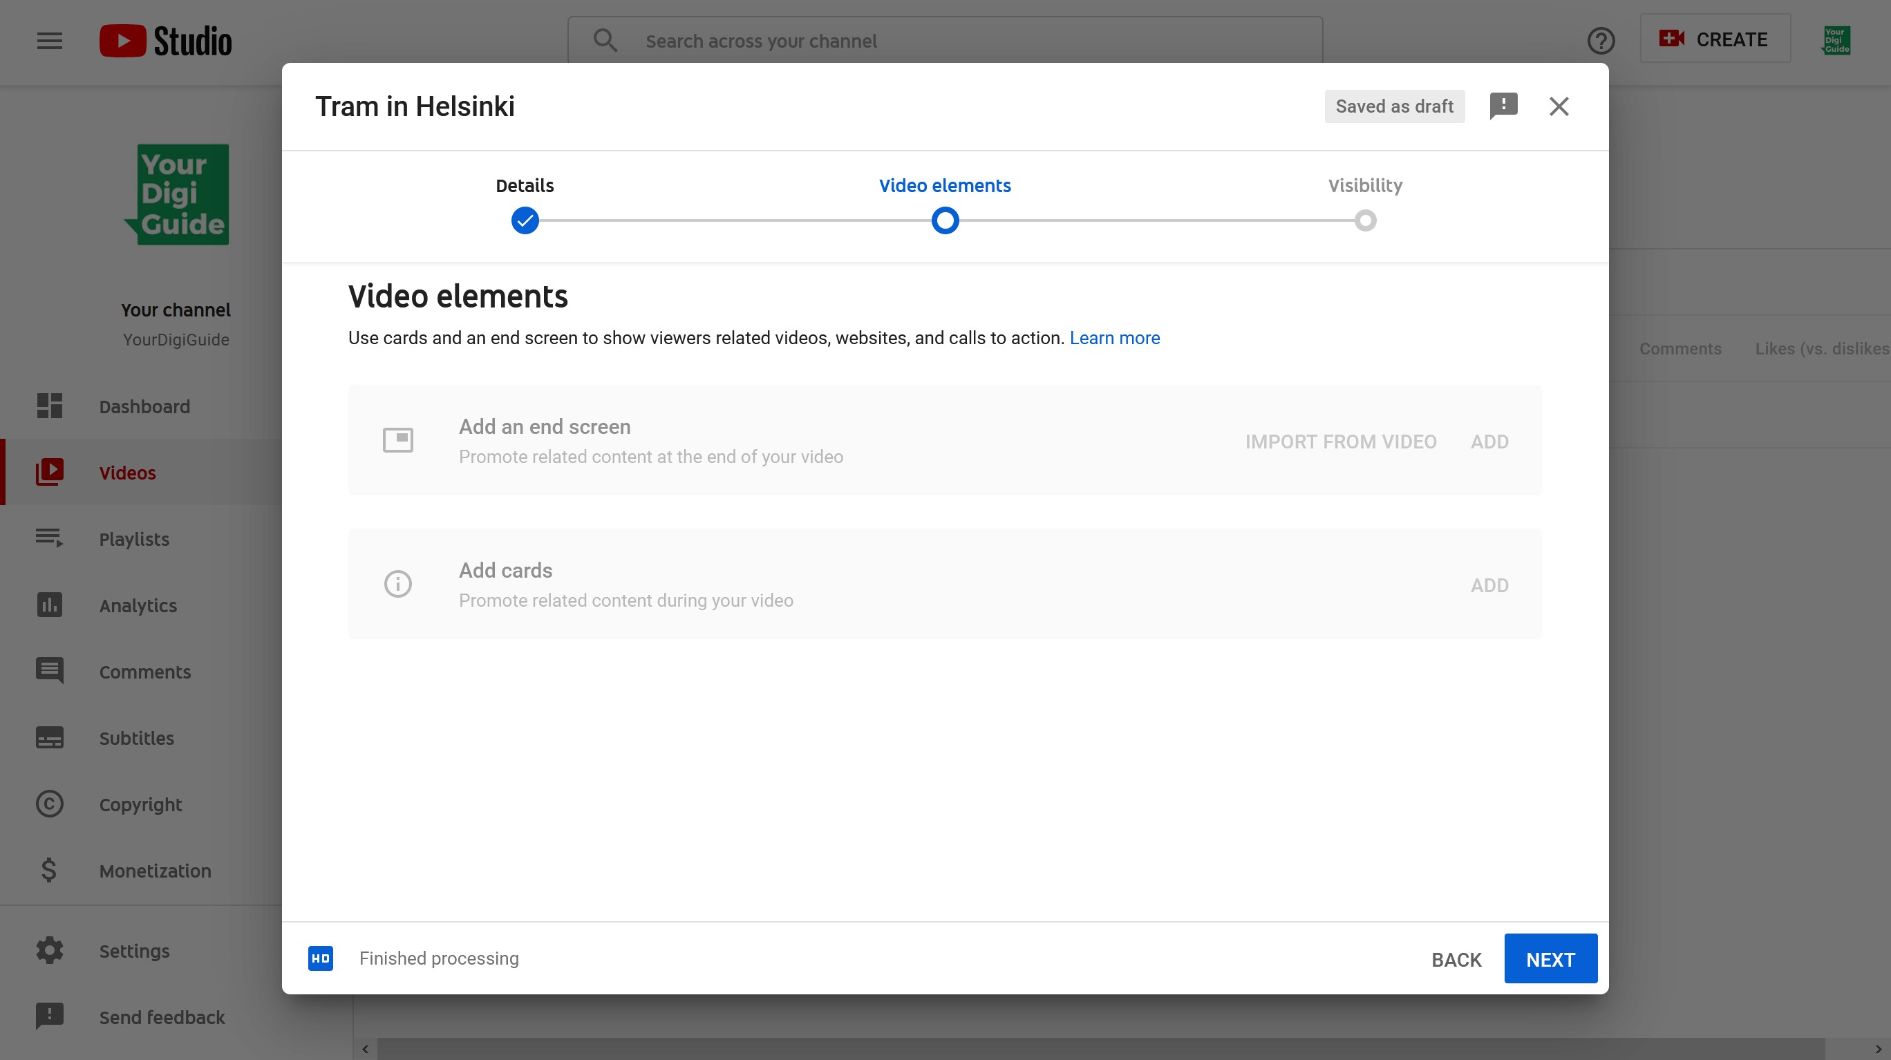
In this step you can add additional info boxes, links and an end screen to your video if you like. All those can make your video more interactive, invite users to take actions and lead them to other pages.
However, if you just want to go for a basic video, you can just skip this step and hit Next.
Step 7
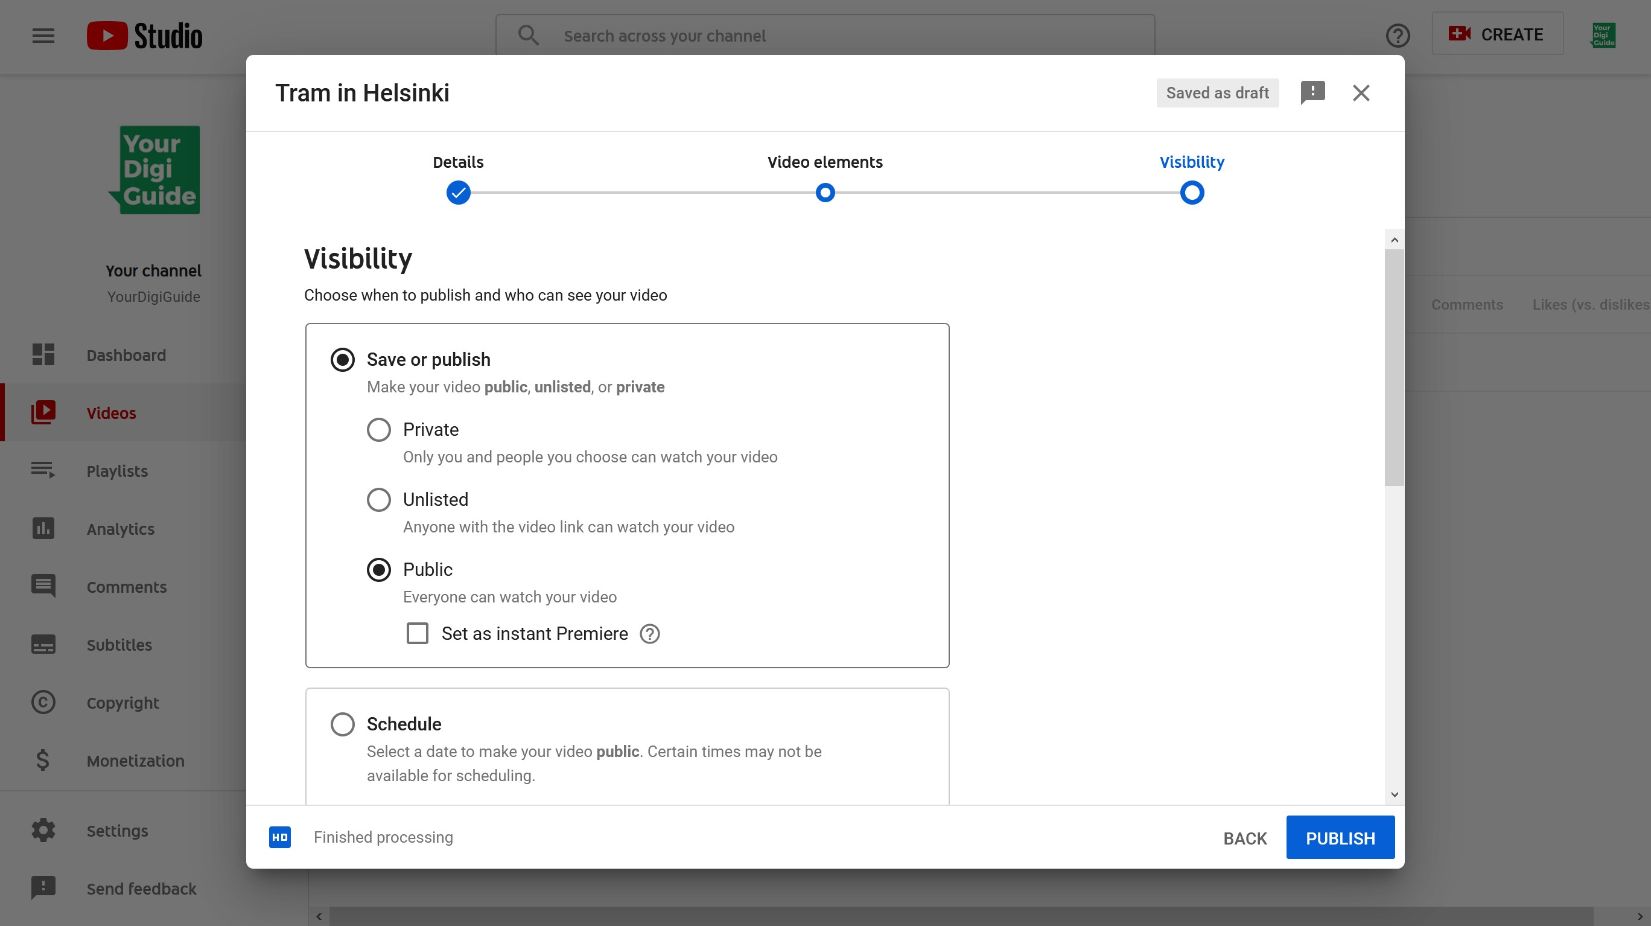
In this step you can choose the visibility of your video. This is a very important choice. You can choose between:
Private: The video will only be visible to you and specific people you invite to see the video. You should only choose this option if the video is very personal, contains sensitive information or is just a draft.
Unlisted: The video cannot be found on YouTube if someone searches for related words. However, anyone that you share the link with can see it. And the video can be embedded in websites.
Public: The video can be found by anyone on YouTube, can be shared and embedded.
Note: You can still adjust this later. However, think carefully which option works best for the video.
Step 8
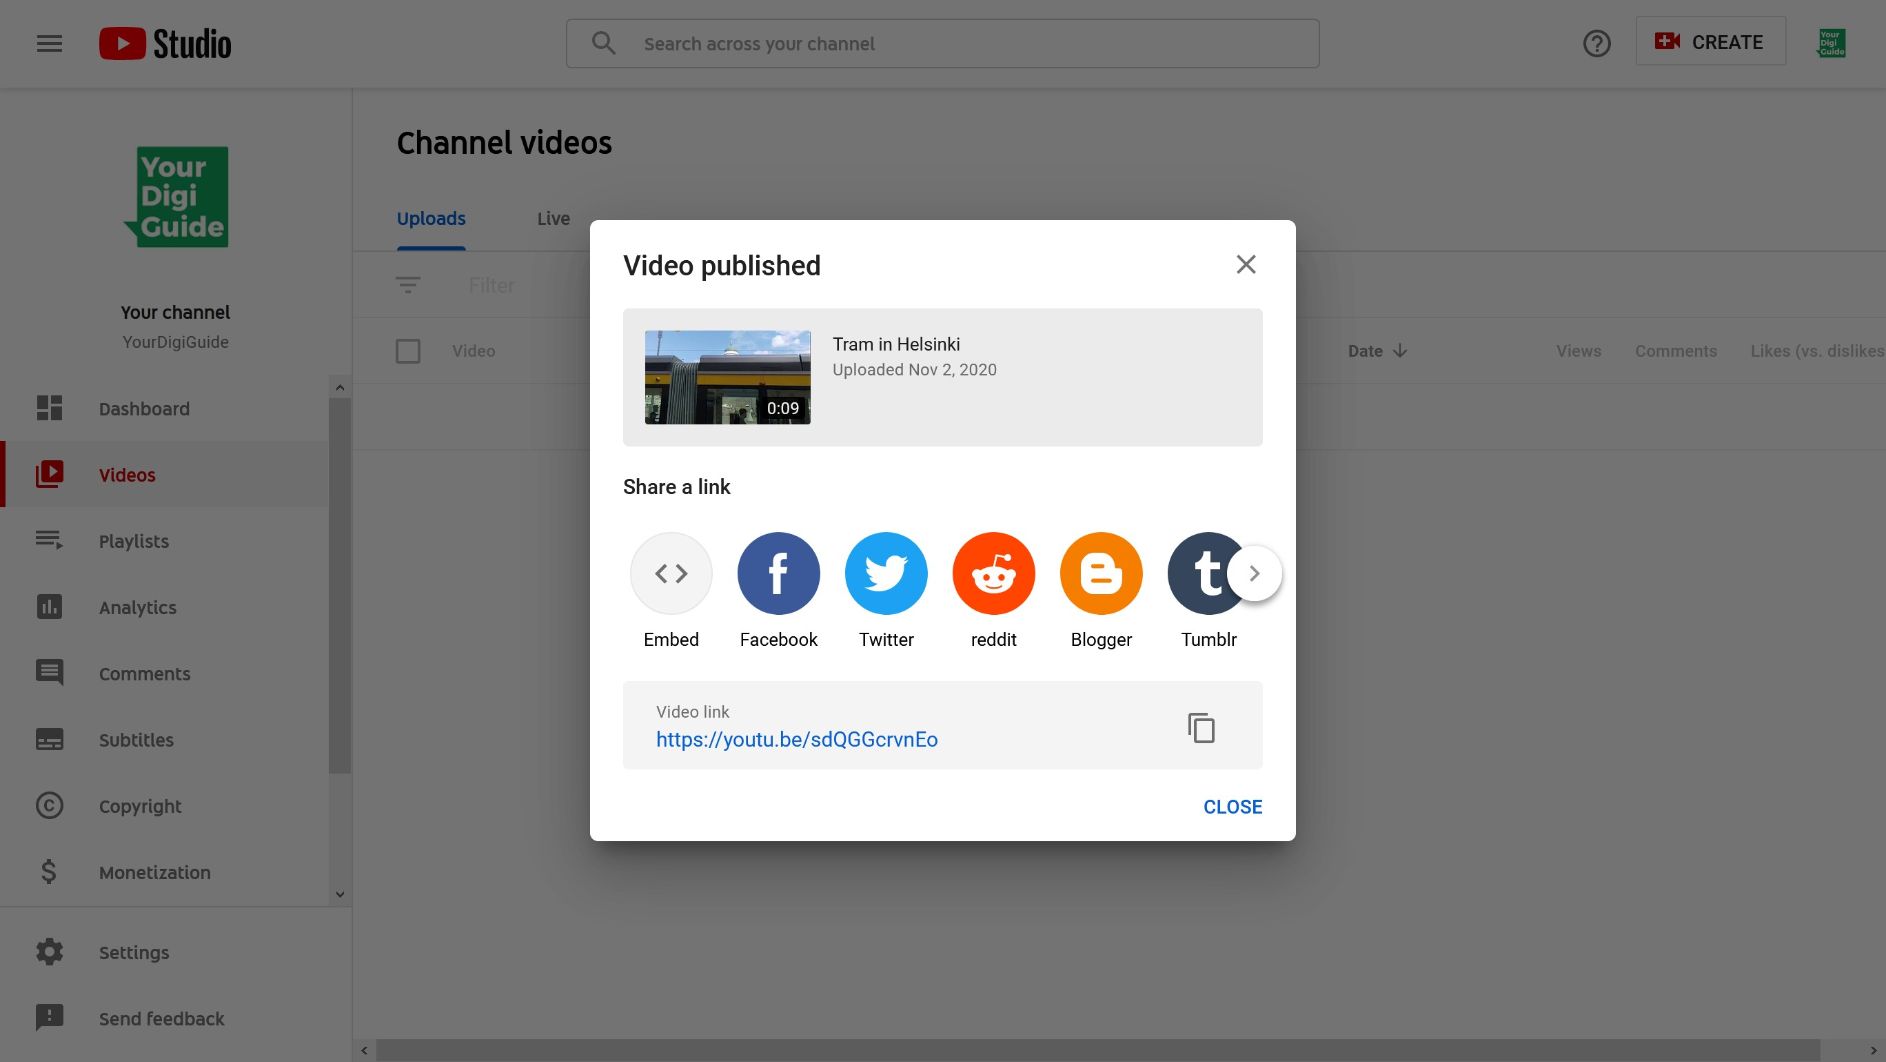
Your video is now configured and once it is fully uploaded, you should see this video saying that your video has been published. To see how your video looks, click the Video link.
Step 9
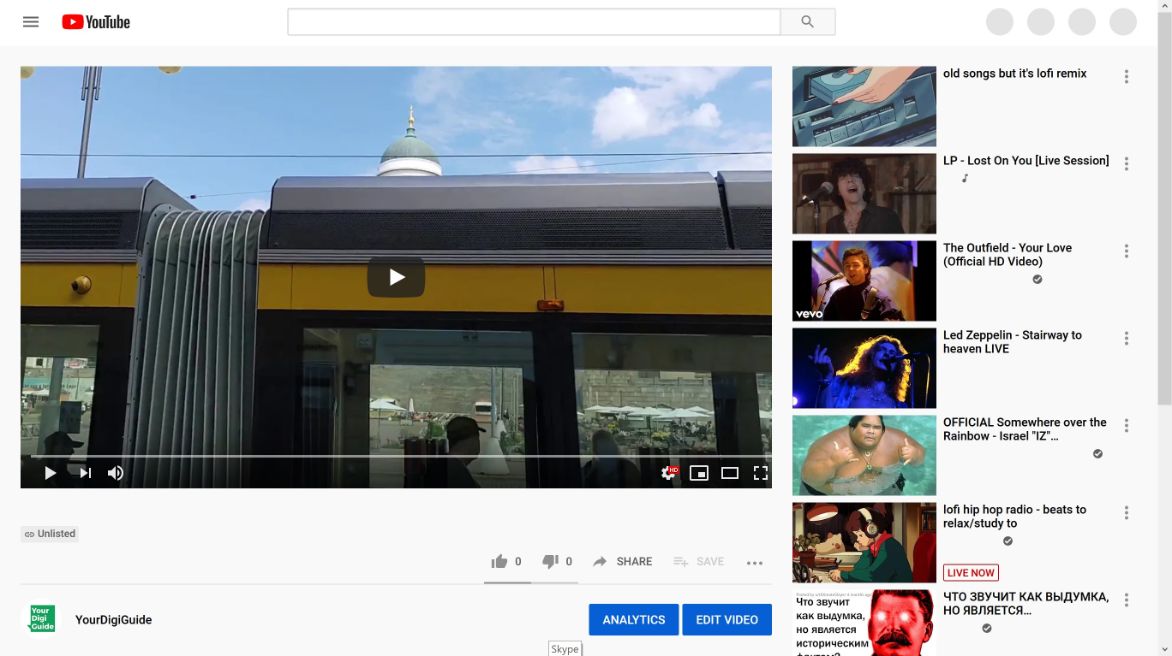
Now you can see your video on YouTube. You are done. If you decide to make any changes (e.g. rename the video, add tags, change the description or visibility) click Edit Video.
You can also always find all your videos and make changes to them in the YouTube Studio.
