Adding subtitles
to a YouTube video
Adding subtitles to your YouTube video
YouTube is a free video platform that can host an unlimited amount of videos for you. The benefit of using an external video hosting platform like YouTube is that you can publish videos without making your website slower and even without having a website at all.
Adding subtitles to your video makes it more accessible to people with hearing problems. But it also will make it easier to follow for people that e.g. want to watch it on the bus or metro without putting the sound on.
You can even add several different language versions so your video can be watched by people who do not understand the original language of the video.
To follow the guide below you must first have uploaded a video to YouTube,
Step 1
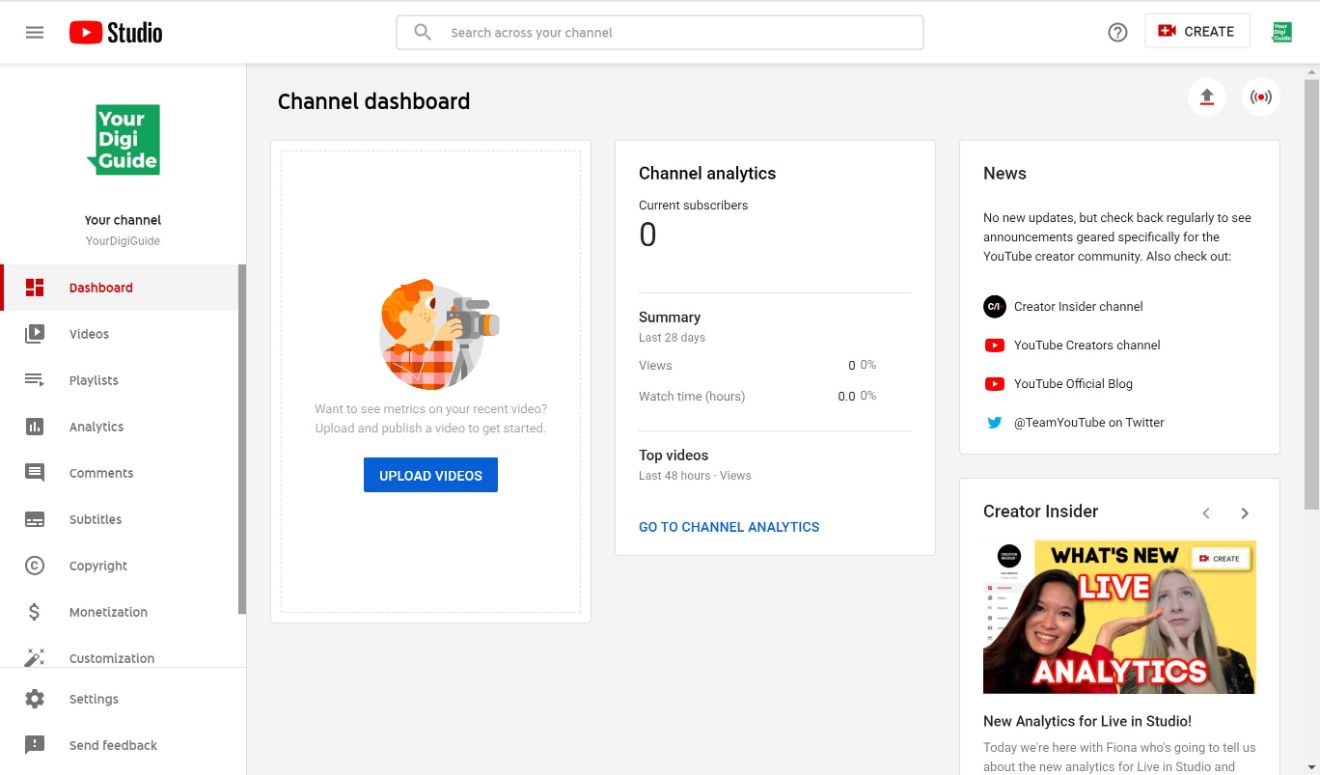
First you need to navigate to the video you want to embed. If you have already uploaded to YouTube, you will find it in the YouTube studio.
Now click on Videos in the left side menu.
Step 2
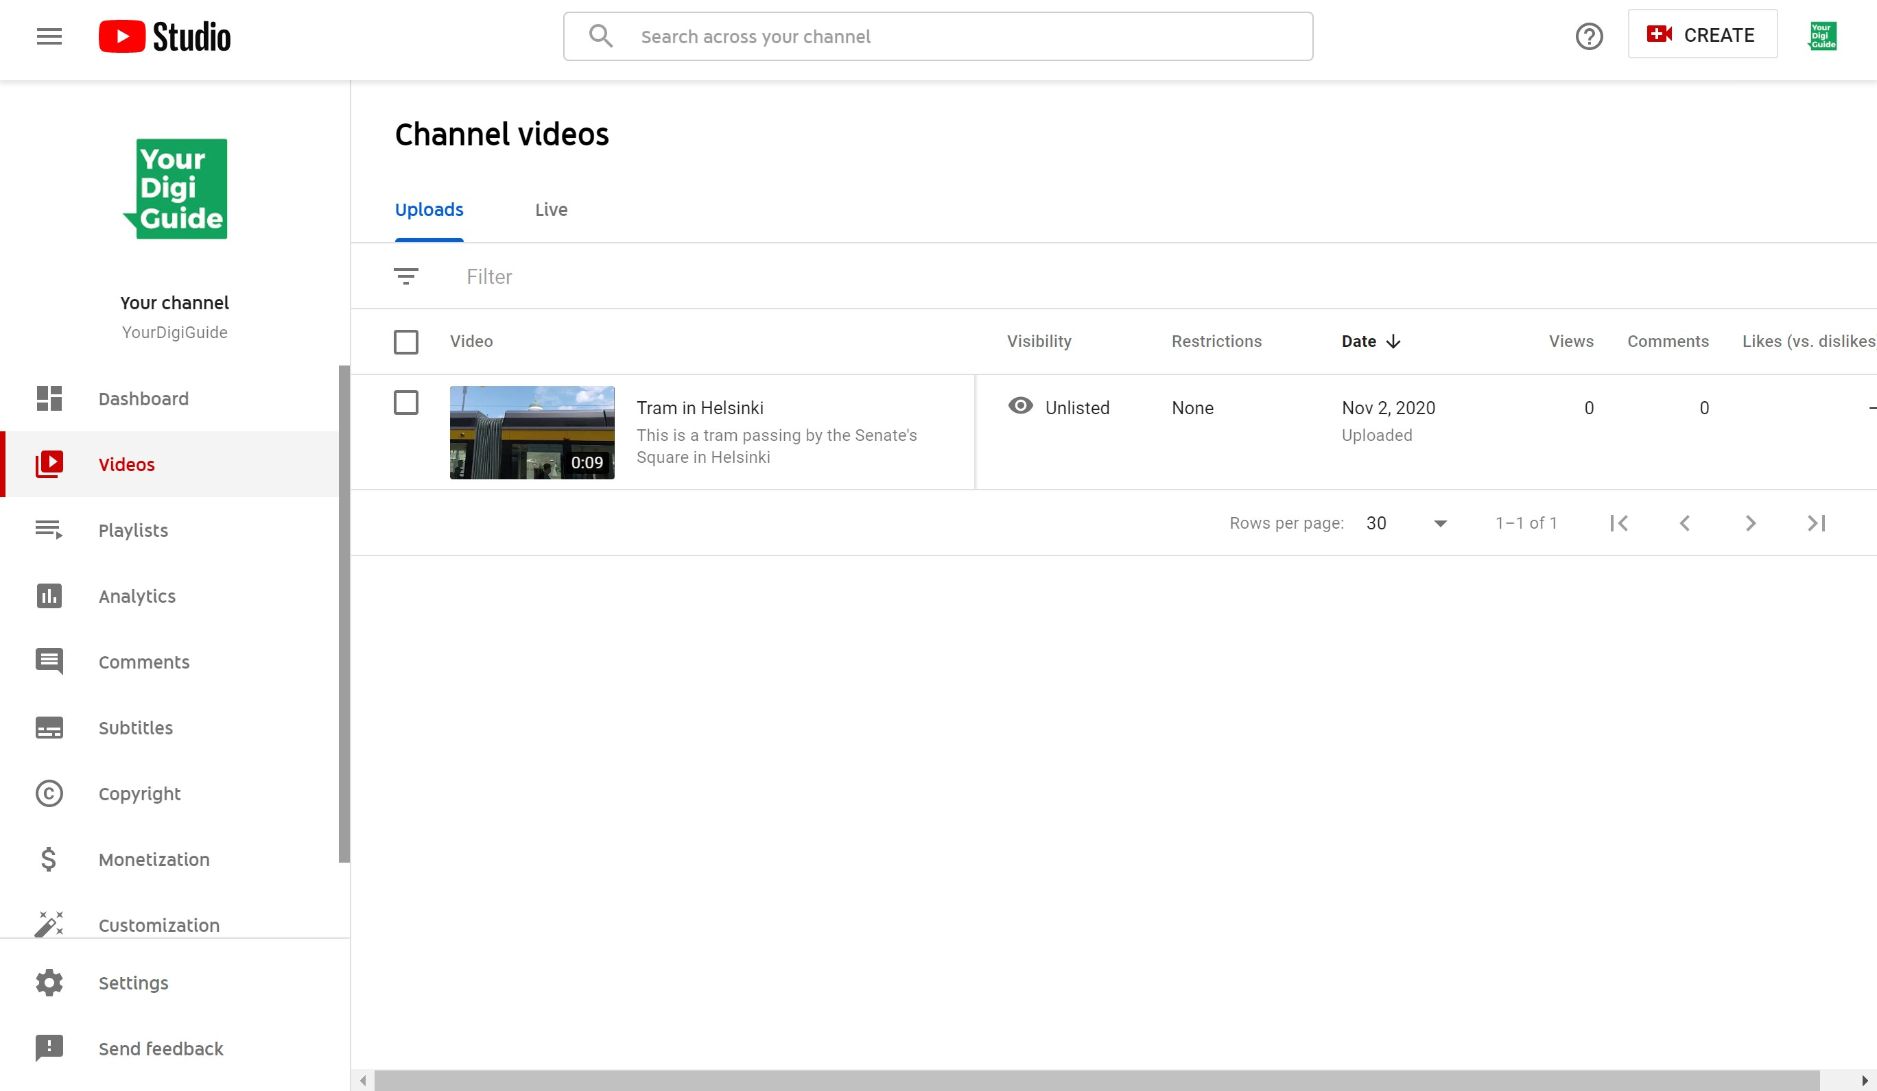
Here you see all your uploaded video. Choose the one you want to add subtitles to by clicking on the image.
Step 3
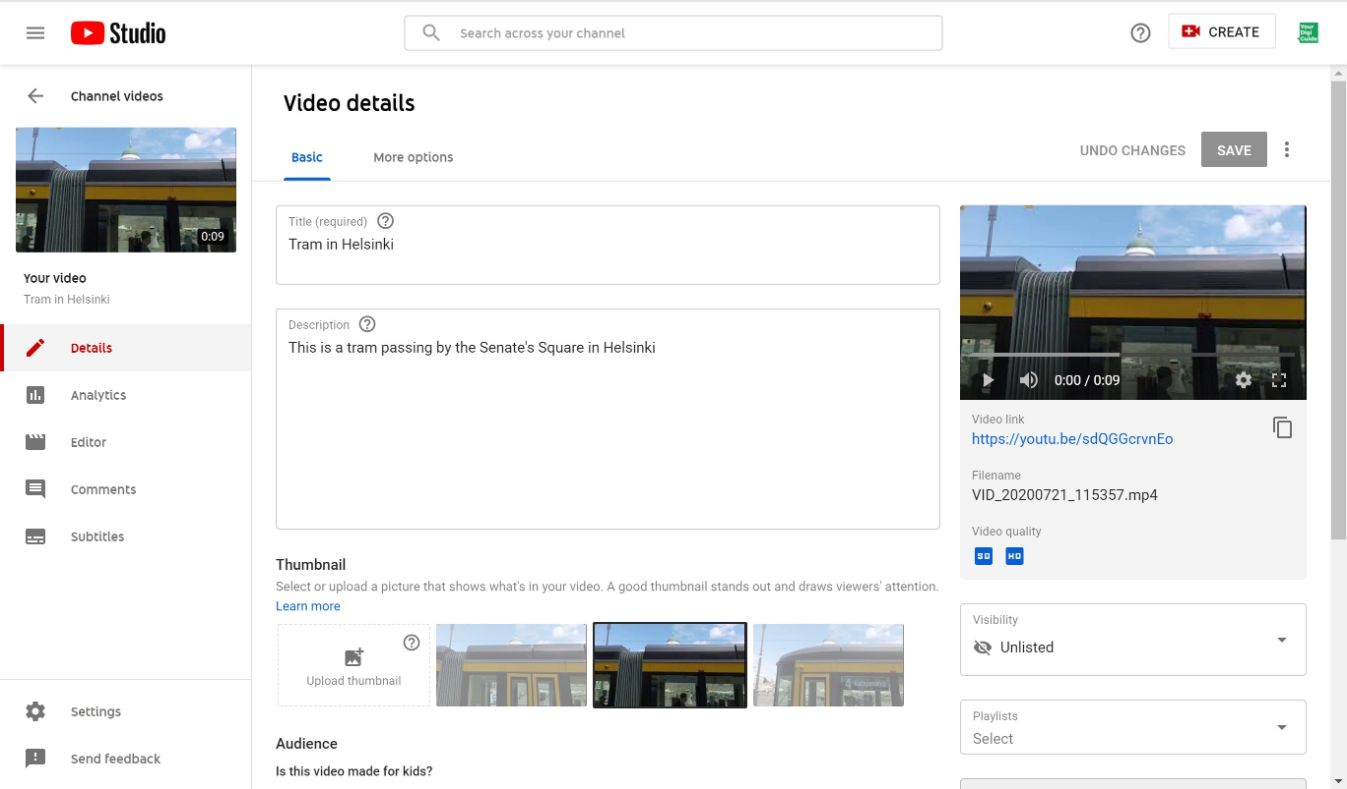
You are now in the settings for the video. Click on Subtitles in the left side menu.
Step 4
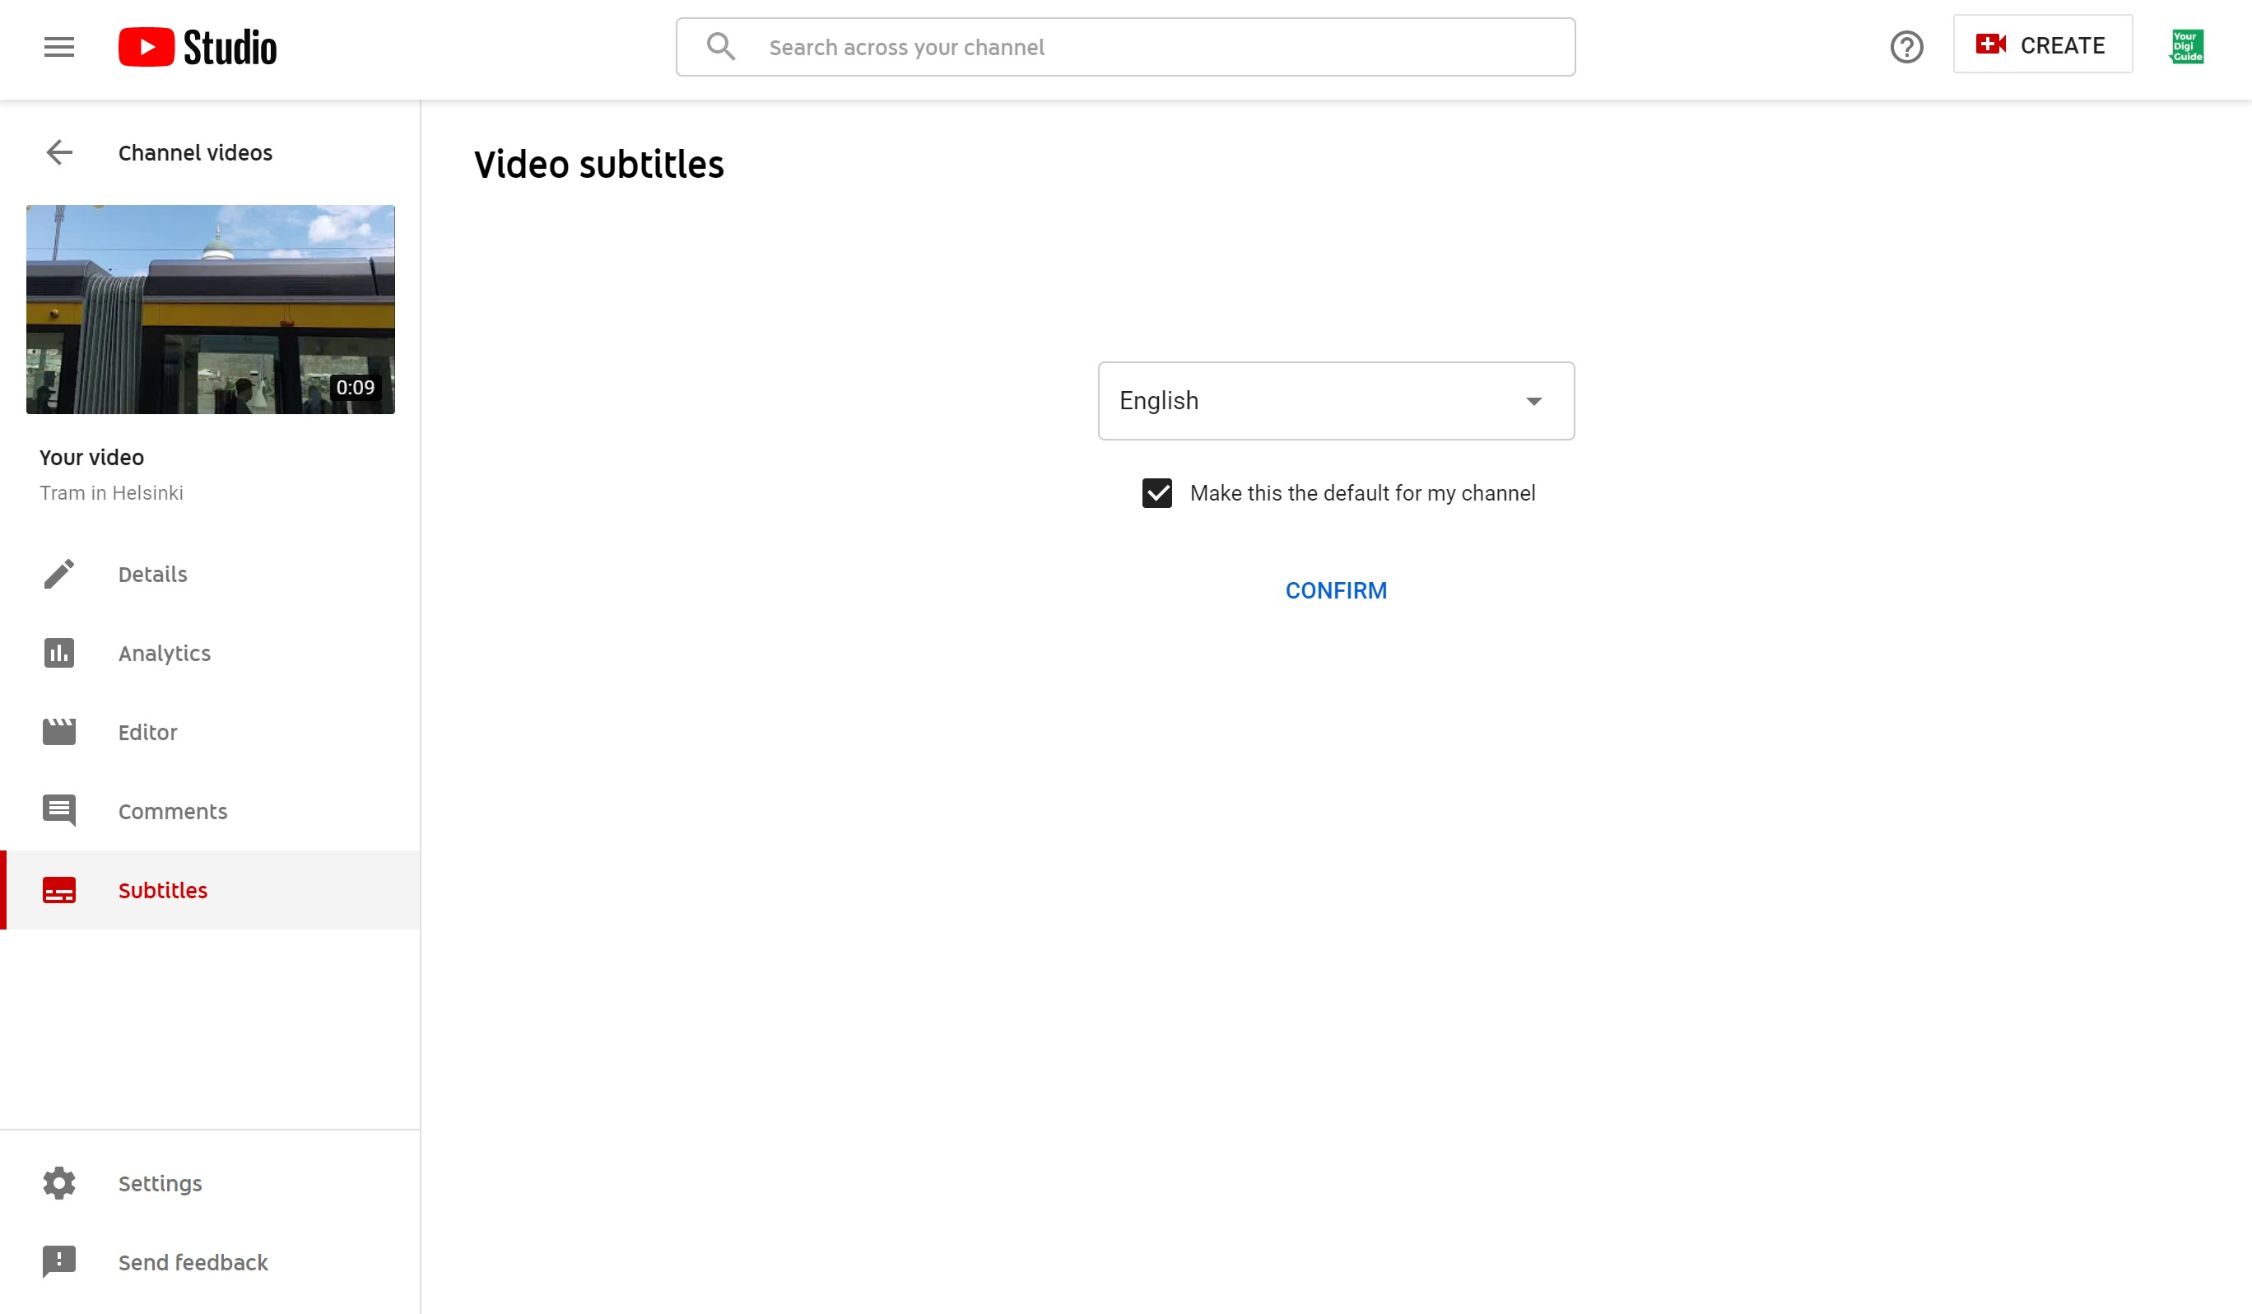
Now you need to first select the language you want to create the subtitles in. If this is the same language that also all your other videos are going to be in, then you can leave the box underneath ticked.
You can still add additional languages later.
Step 5
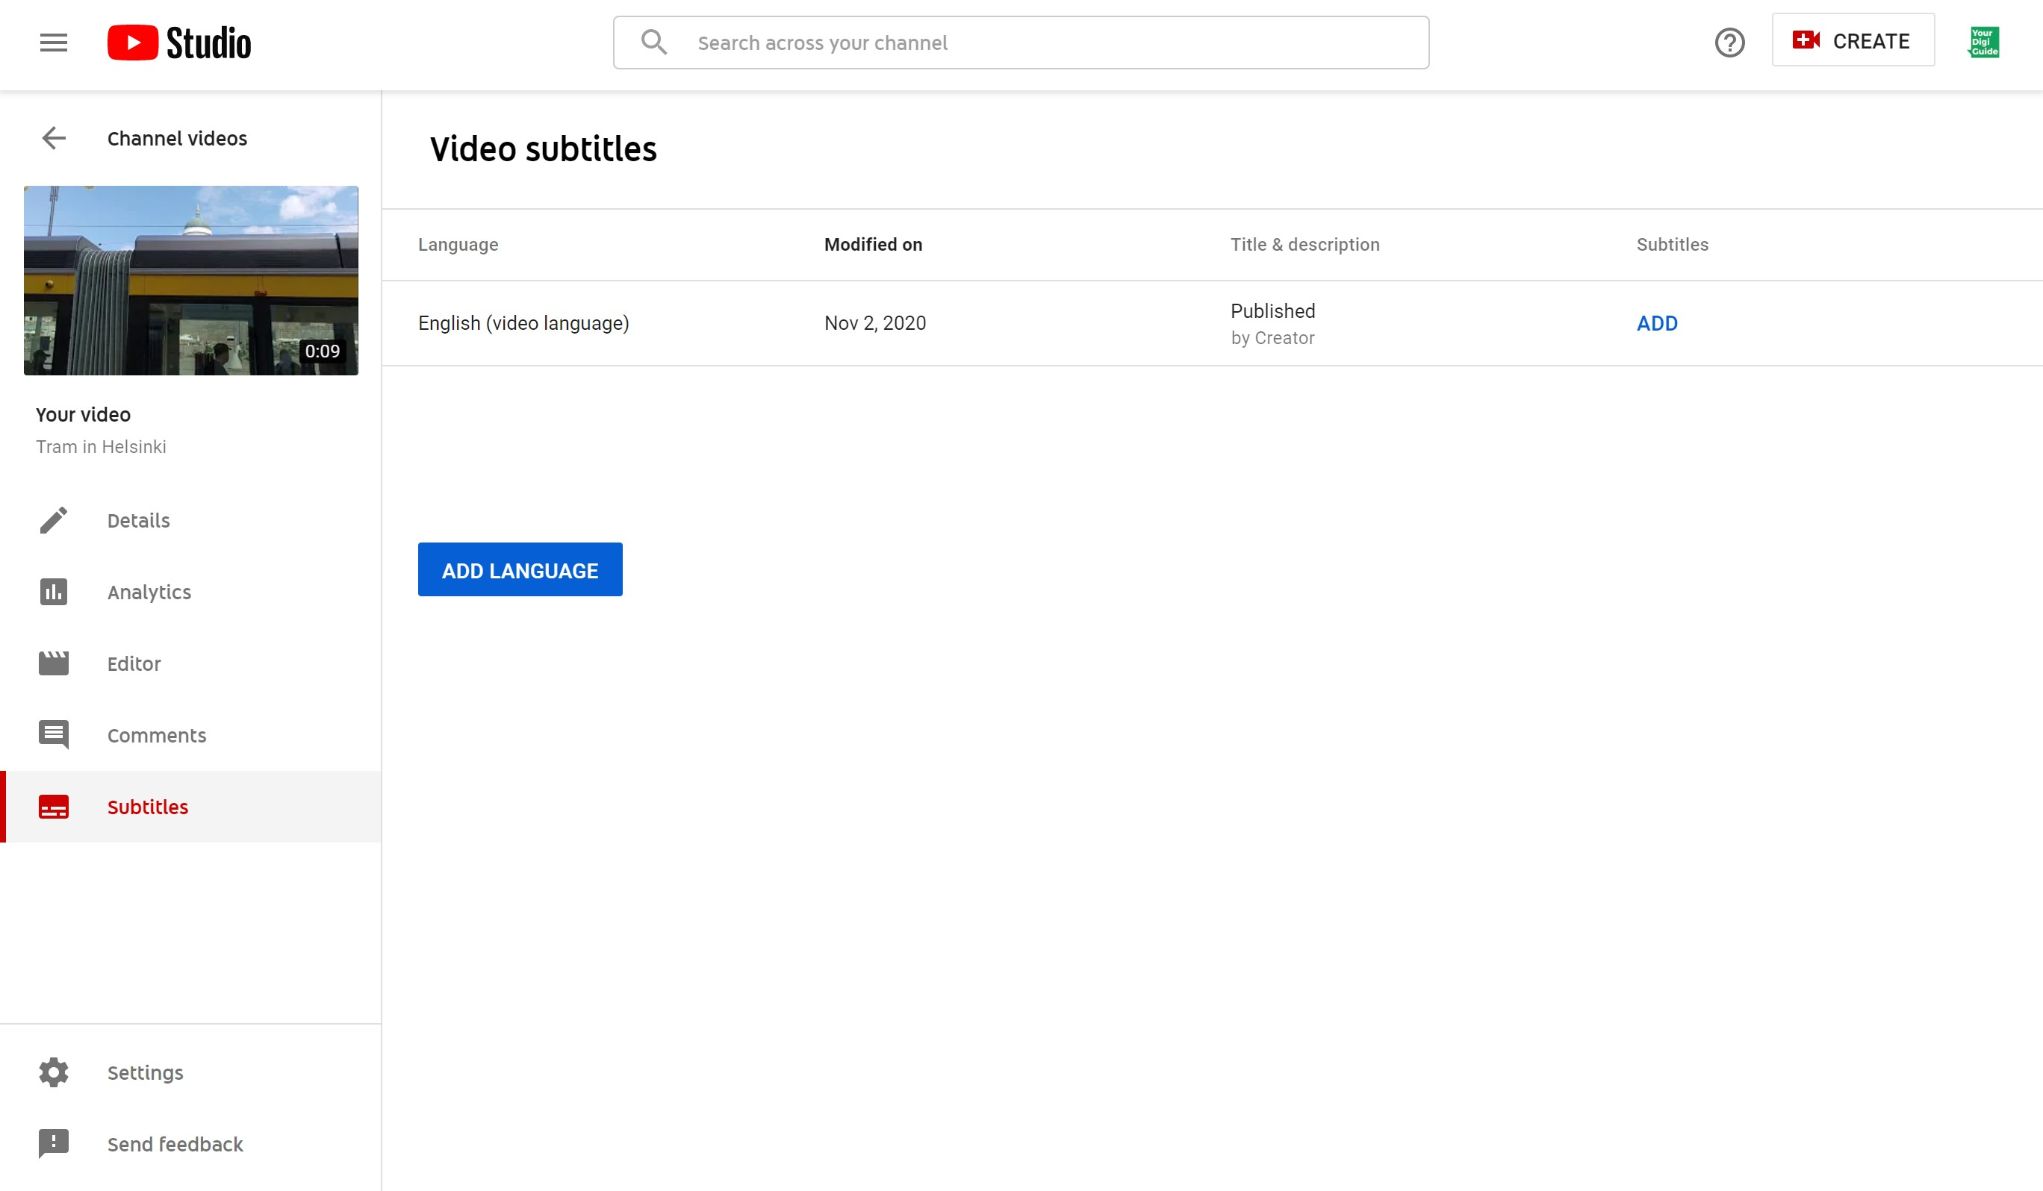
Now the language selection has been saved and is listed. Click Add on the right side to add the actual subtitles.
Step 6
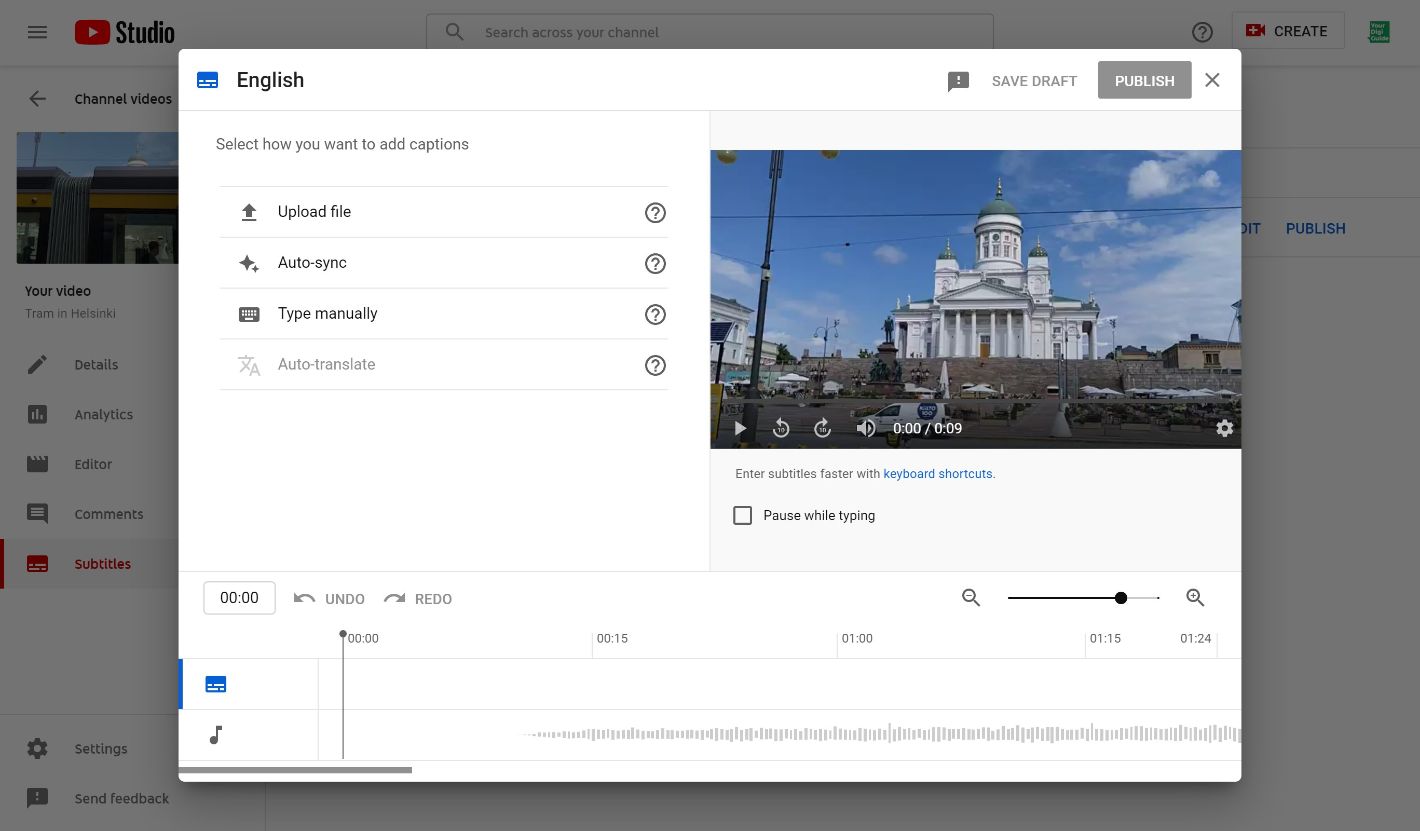
The subtitle dialog opens now. Here you can choose between different options for adding subtitles.
Upload a file: If you have already created subtitles for the video earlier with another tool, you can upload the subtitle file (usually the file name ends in .srt, .sbv or .sub) here.
Auto-sync: For some languages YouTube is able to create the subtitles automatically. If this option is available, you can try it out. Make sure to cross-check the automatically created subtitles later, though. They might not always work perfectly.
Type manually: If you want or have to create the subtitles yourself, go for this option. It is the most time-consuming but also safest to keep full control over what is written in the subtitles.
Step 7
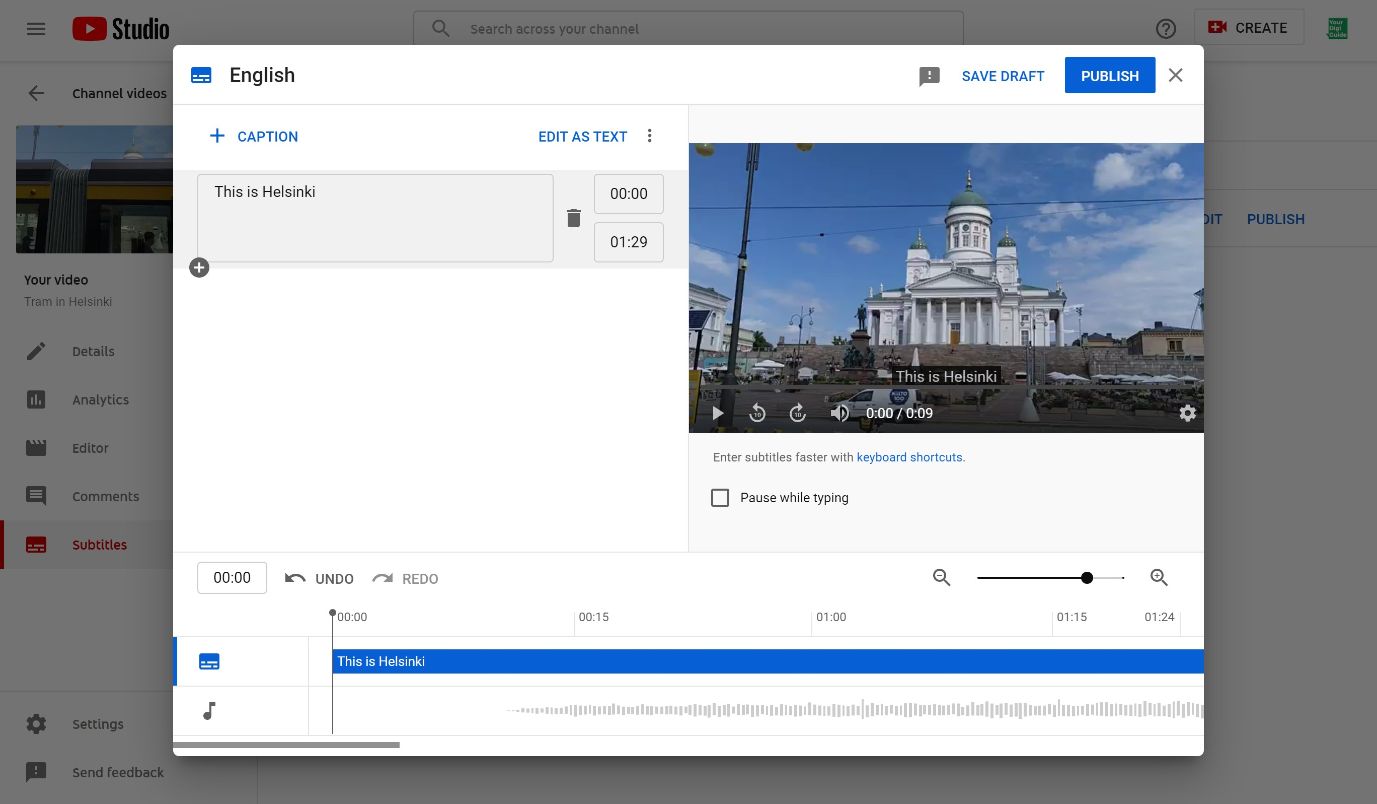
If you go for manual subtitles, you can do that in the subtitle editor. On the right side you can watch the video. On the left side you can add subtiles, or captions. Make sure to not write too long texts per caption. For every caption you can adjust the length with the time stamps on the side.
Once you are happy with your subtitles, click Publish.
You are now done and the subtitles can be activated by viewers by clicking the CC icon on the bottom of the video.
